
KOYO ATM1900 Protective Film Touch Screen Replacement
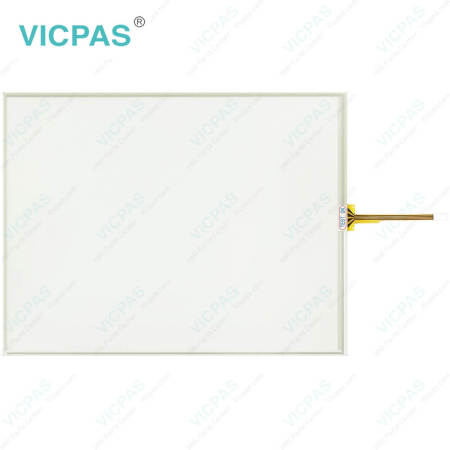
Koyo ATLAS Industrial Monitors ATM1900 Touchscreen Panel Front Overlay Replacement
Order each part separately is available

VICPAS supplies ATLAS Industrial Monitors ATM1900 Protective Film and Touch Panel with 365 days warranty and support Urgent Worldwide Shipping.
Atlas industrial ATM1900 Front Overlay Touch Membrane monitors are high-performance color TFT flat panel monitors specifically designed for harsh industrial environments including Class I Division 2, Class II Division 2 and Class 3 hazardous locations. Each monitor accepts standard analog VGA or digital DVI inputs and can display all VESA video modes up to 1280 x 1024 at 75Hz with 16 million colors. An optional 5-wire analog ATM1900 touchscreen offers RS-232 and USB interface capability. The ATM1900 HMI Panel Glass Protective Film monitor is housed in a heavy-duty steel chassis with a powder-coated machined aluminum bezel. The monitor is certified to NEMA 4/4X/12 standards and is UL/CUL listed. Panel mounting is simplified using convenient mounting clips instead of conventional studs.
Specifications:
The table below describes the parameters of the Koyo ATLAS Industrial Monitors ATM1900 Front Overlay Touch Screen Monitor HMI Parts.
| Ambient temperature: | 0°C (32°F) to 50°C (122°F) |
| Display Resolution: | 1080 x 1024 pixels |
| Part Number: | ATM1900 |
| Product Line: | ATLAS Industrial Monitors |
| Touch Size: | 19" |
| Brand: | KOYO |
| Display Type: | TFT Color LCD |
| Power supply: | 24 V DC |
| Storage Temperature: | -20°C (-4°F) to 60°C (140°F) |
| Warranty: | 365 Days |
Related Koyo ATLAS Industrial Monitors Series HMI Part No. :
| ATLAS Industrial Monitors | Description | Inventory status |
| ATM1500 | KOYO ATLAS Industrial Monitors Front Overlay Touch Membrane | In Stock |
| ATM1500T | Koyo ATLAS Industrial Monitors Touch Glass Front Overlay Repair | In Stock |
| ATM1700 | Koyo ATLAS Industrial Monitors Touch Digitizer Glass Overlay Repair | Available Now |
| ATM1700T | KOYO ATLAS Industrial Monitors HMI Panel Glass Protective Film | Available Now |
| ATM1900 | Koyo ATLAS Industrial Monitors Touch Screen Monitor Front Overlay | In Stock |
| ATM1900T | Koyo ATLAS Industrial Monitors Front Overlay MMI Touch Screen Replacement | Available Now |
| ATLAS Industrial Monitors | Description | Inventory status |
KOYO Atlas Industrial Monitor HMI Manuals PDF Download:
FAQ:
Question: Optional Protective Cover Installation
Solution:
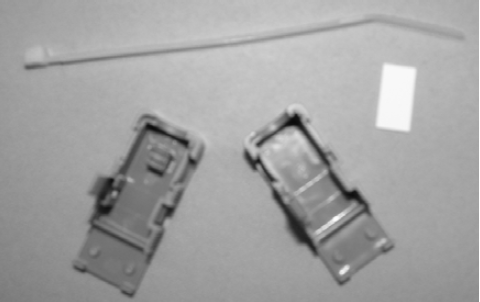
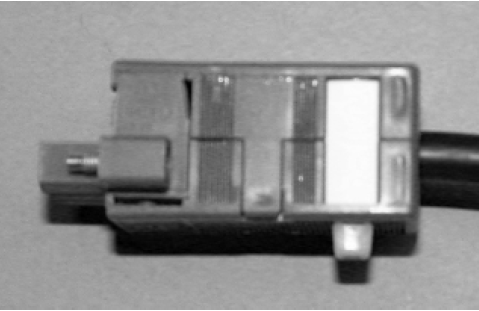
Step 1: Gather the parts of the protective cover; top shell, bottom shell, label insert, and wire tie. The picture shows the wire tie (top), label insert (right), bottom shell (left), and top shell (lower right).
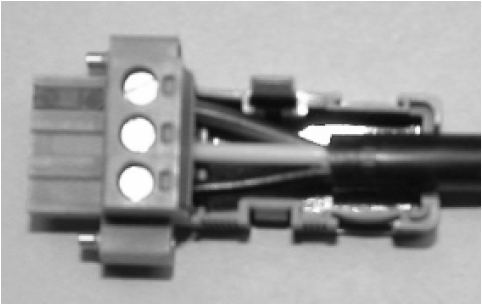
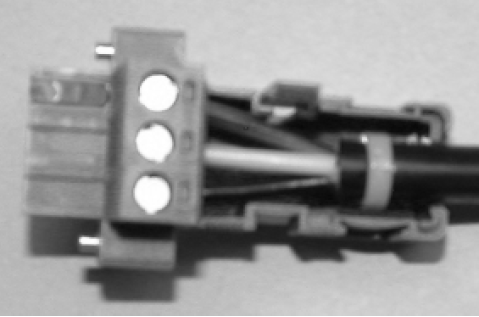
Step 2: Insert your pre-wired connector (with the screws facing up) into the bottom shell. (See manual for cable wiring instructions).
Step 3: Insert the wire tie from the bottom shell, loop around the cable and come back out of the opposite hole in the bottom shell.
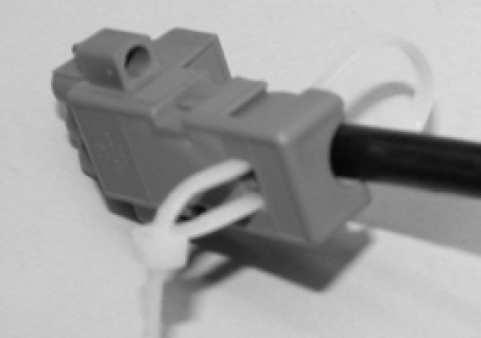
Step 4: Tighten the wire tie around the cable and the bottom shell.
Step 5: Seat the top shell onto the bottom as shown. Insert label strip (if desired) in slot on top shell and bottom shell.
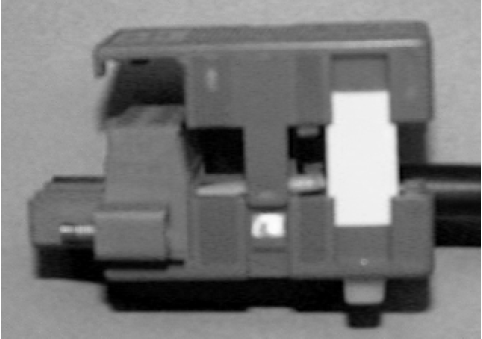
Step 6: Snap the top and bottom shells together.
Common misspellings:
ATM900TM1900
ATM9100
A7M1900
ATM19000
- Loading...


- Phone
- *Title
- *Content
 Fast Quote
 Fast Quote
 Worldwide Shipping
 12 Months Warranty
 Customize Service
- Phone
- *Title
- *Content
