
KOYO GC-56LC GC-56LC2 HMI Touch Panel Protective Film
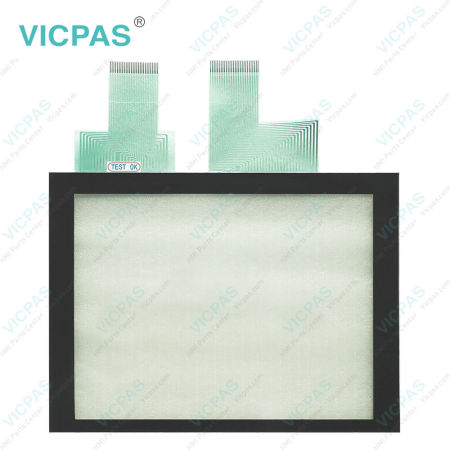
Koyo GC-56LC GC-56LC2 Touch Panel Front Overlay Replacement Repair Part
Order each part separately is available

Koyo GC-56LC GC-56LC2 Front Overlay Touch Membrane Terminal is fully programmable touch panels, providing power and flexibility through a rich set of features. The DirectTouch Panel is configured using the ScreenCreator software. The software is a graphics editor with built-in panel parts such as number keypads, pushbuttons, indicator lights, meters and graphs.
VICPAS supplies KOYO GC-56LC GC-56LC2 Protective Film and Touch Panel with 365 days warranty and support Urgent Worldwide Shipping. It is important to understand the installation requirements for operator interfaces. Sometimes the size alone can dictate your choice of GC-56LC GC-56LC2 Touch Screen Monitor Front Overlay unit. This is especially true with respect to the depth of the GC-56LC GC-56LC2 Touch Panel Protective Film unit. Please make sure you consider the space required for proper access to cables, power wiring, etc. Also, you may need to consider the environmental requirements, agency approvals, etc. for your application.
Specifications:
The table below describes the parameters of the Koyo GC-56LC GC-56LC2 Touch Screen Monitor Front Overlay HMI Parts.
| Ambient temperature: | 0°C (32°F) to 50°C (122°F) |
| Part Number: | GC-56LC GC-56LC2 |
| Product Line: | Koyo auto parts |
| Display Device: | STN/TFT color LCD |
| Brand: | KOYO |
| Power supply: | 24 V DC |
| Storage Temperature: | -20°C (-4°F) to 60°C (140°F) |
| Warranty: | 365 Days |
Related Koyo Auto Machine HMI Part No. :
| KOYO GC50 HMI | Description | Inventory status |
| GC-53LC | KOYO GC-50 Front Overlay Touch Membrane | In Stock |
| GC-53LC2 | Koyo GC-50 Series Touch Glass Front Overlay Repair | In Stock |
| GC-53LC3 | Koyo GC-50 Series Touch Digitizer Glass Overlay Repair | Available Now |
| GC-53LC3-1 | KOYO GC-50 HMI Panel Glass Protective Film | Available Now |
| GC-53LM | Koyo GC50 Series Touch Screen Monitor Front Overlay | In Stock |
| GC-53LM2 | Koyo GC50 Series Front Overlay MMI Touch Screen Replacement | In Stock |
| GC-53LM3 | Koyo GC-50 Series HMI Touch Screen Protective Film | Available Now |
| GC-53LM3-1 | Koyo GC-50 Series Protective Film Touchscreen Repair | In Stock |
| GC-55EM | Koyo GC50 Series HMI Protective Film Touch Screen Glass | Available Now |
| GC-55EM2 | Koyo GC50 Series Front Overlay Touch Screen Panel Repair | In Stock |
| GC-56LC | KOYO GC50 Series Touch Screen Protective Film Replacement | In Stock |
| GC-56LC2 | Koyo GC50 Series Protective Film Touch Panel Repair | Available Now |
| GC-5LC | Koyo Front Overlay Touch Digitizer Glass Repair | Available Now |
| Koyo GC-50 MMI | Description | Inventory status |
KOYO HMI Manuals PDF Download:
FAQ:
Question: Optional Protective Cover Installation
Solution:
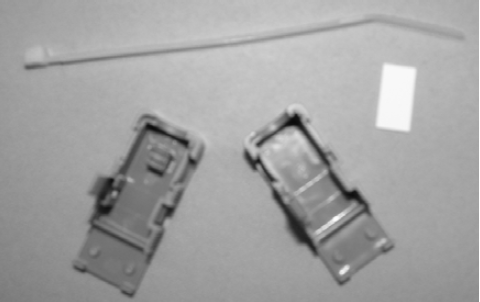
Step 1: Gather the parts of the protective cover; top shell, bottom shell, label insert, and wire tie. The picture shows the wire tie (top), label insert (right), bottom shell (left), and top shell (lower right).
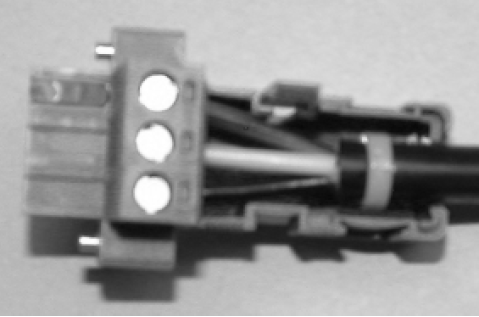
Step 2: Insert your pre-wired connector (with the screws facing up) into the bottom shell. (See manual for cable wiring instructions).
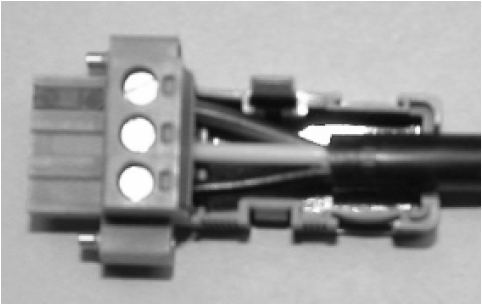
Step 3: Insert the wire tie from the bottom shell, loop around the cable and come back out of the opposite hole in the bottom shell.
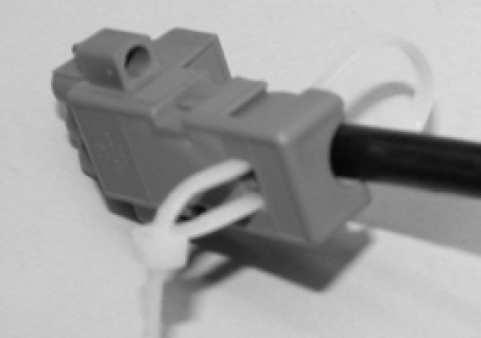
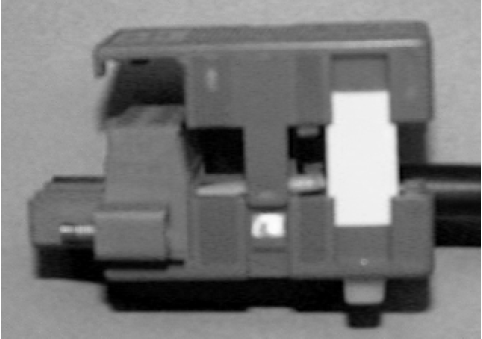
Step 4: Tighten the wire tie around the cable and the bottom shell.
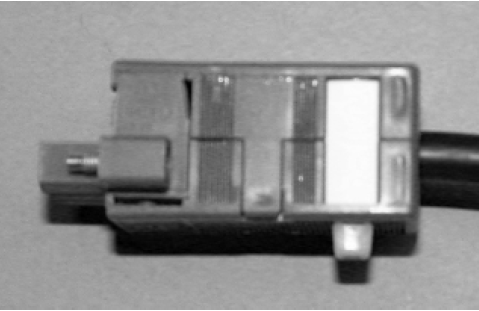
Step 5: Seat the top shell onto the bottom as shown. Insert label strip (if desired) in slot on top shell and bottom shell.
Step 6: Snap the top and bottom shells together.
Common misspellings:
GC-56LC G-56LC2GC-6LC GC-56LC2
GC-56LC GC-56CL2
GC-561C GC-56LC2
GC-56LC GCC-56LC2
- Loading...


- Phone
- *Title
- *Content
 Fast Quote
 Fast Quote
 Worldwide Shipping
 12 Months Warranty
 Customize Service
- Phone
- *Title
- *Content
